


New to The Bump
 bethennyfrankel
member
bethennyfrankel
member


Options
Siggy How-Tos
bethennyfrankel
member
Editing Your Siggy
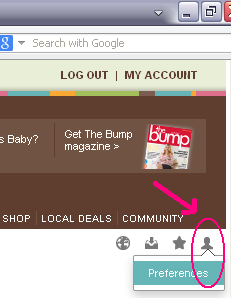
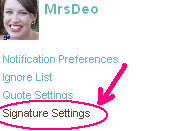
Go here: https://forums.thebump.com/profile/signature. The page can also be found by clicking the icon of a person’s head at the top right of your screen selecting preferences, and then “Signature Settings.” You can only edit your siggy on a computer or through a mobile browser, not on the app.
Adding Images
Images Saved on Computer
- Place your courser where you'd like the image to appear while on the Signature Settings page.
- Select the "attach image" button on the toolbar.
- Select the "Choose Files" button.
- Select the images you wish to add and select "Open".
Images Found on Google
- Locate the image you'd like to add.
- Save the image to your computer by right clicking the image and selecting "Save image as..."
- Follow the directions above.
or
- Locate the image you'd like to add.
- Open the image in a new tab by right clicking the image and selecting "Open image in new tab"
- Navigate to the new tab with the image.
- Copy the new tab URL (this URL should end in .png, .jpg, etc.)
- Navigate back to the Signature Settings page.
- Select the "attach image" button on the toolbar.
- Paste the URL in the "Image URL" field.
- If the image does not automatically add, press the Enter key on your keyboard.
Editing Image Size
If your image is too large, follow these directions. These directions can also be used to enlarge an image, but it may affect quality.- Add the image using directions above.
- Select the "Toggle HTML View" button on the toolbar (appears as </>).
- Find the image in the HTML code. This will appear as
<img alt="" src="https://us.v-cdn.net/5020794/uploads/editor/q1/jjptdlmmwgyo.png">
where the image URL appears as the source (src). - Place your courser between the last " and last > and add width="300". In the example above, this would be:
<img alt="" src="https://us.v-cdn.net/5020794/uploads/editor/q1/jjptdlmmwgyo.png"<b> </b>width="300">
- Select the "Toggle HTML View" button on the toolbar.
- Continue to toggle views and adjust the image width until it appears as desired (this number is usually between 200 and 400 for a siggy).
Adding Gifs
Follow the same directions for adding an image. Make sure the file name ends in ".gif"Adding Tickers
- Generate the ticker code. You can do this by going to any website that generates a ticker or going to The Bump's ticker generator page (https://global.thebump.com/) and following the directions provided.
- Copy the HTML provided. This should appear as something similar to below:
<a href="https://www.thebump.com/?utm_source=ticker&utm_medium=HTML&utm_campaign=tickers" title="Pregnancy"><img src="https://global.thebump.com/tickers/tt1d9056" alt=" BabyFruit Ticker" border="0" /></a>
- Navigate to the Signature Settings page.
- Select the "Toggle HTML View" button on the toolbar (appears as </>).
- Paste the ticker code.
- Select the "Toggle HTML View" button on the toolbar.
- Continue to toggle views and adjust the ticker placement until it appears as desired.
Adding Hyperlinks
- Find and copy the URL you wish to hyperlink to.
- Highlight the text or image you wish to hyperlink in your siggy.
- Select the "Url" button on the toolbar.
- Paste the URL in the "https://" field.
- Select OK.
Adding a Spoiler
- Type/add all content you wish to your siggy.
- Highlight the text/images you wish to appear in a spoiler.
- Select the "Format" button on the toolbar.
- Select "Spoiler"
- The text you selected should appear in a gray box while you're drafting. This box will turn into a spoiler after you post.
Me: 25 | DH: 32
TTC #1: November 2016
IF Dx NIR PCOS: March 2017
BFP: June 2017 | DS: February 2018
TTC #1: November 2016
IF Dx NIR PCOS: March 2017
BFP: June 2017 | DS: February 2018